
In this category Design & layout
Use your own fonts in the design
How to put a font as a .woff2 file in a Fonts folder in the File and media manager and use it in your design through the Code Editor, so it loads from your own shop.
On this page
The fonts you choose in the design are already loaded from your shop's own server. But if you want a font that isn't on the list, you need to add it to the shop yourself.
You can do that in the File and media manager, which accepts fonts in the .woff2 and .woff formats. The font then sits on your own shop, and the visitor's browser loads it from there.
That is better than loading it directly from Google Fonts, for example. If you do that, the browser sends the visitor's IP address to Google before the customer has answered your cookie banner, and German lawyers have sent online shops claims over exactly that.
What you need
- The font as a .woff2 file. It works in all recent browsers. If you also have a .woff file, you can upload it, but you don't have to.
- A licence that allows the font to be used on a website. Free fonts from Google Fonts may be used that way.
The File and media manager does not accept .ttf and .otf files. If you only have the font in one of those formats, it has to be converted to .woff2 first.
In this example we use the font Playfair Display from Google Fonts, in the file PlayfairDisplay.woff2.
1. Create the Fonts folder
We recommend keeping your fonts in a folder of their own, so they don't get mixed up with your images. Call the folder Fonts.
Go to Tools > File and media manager.
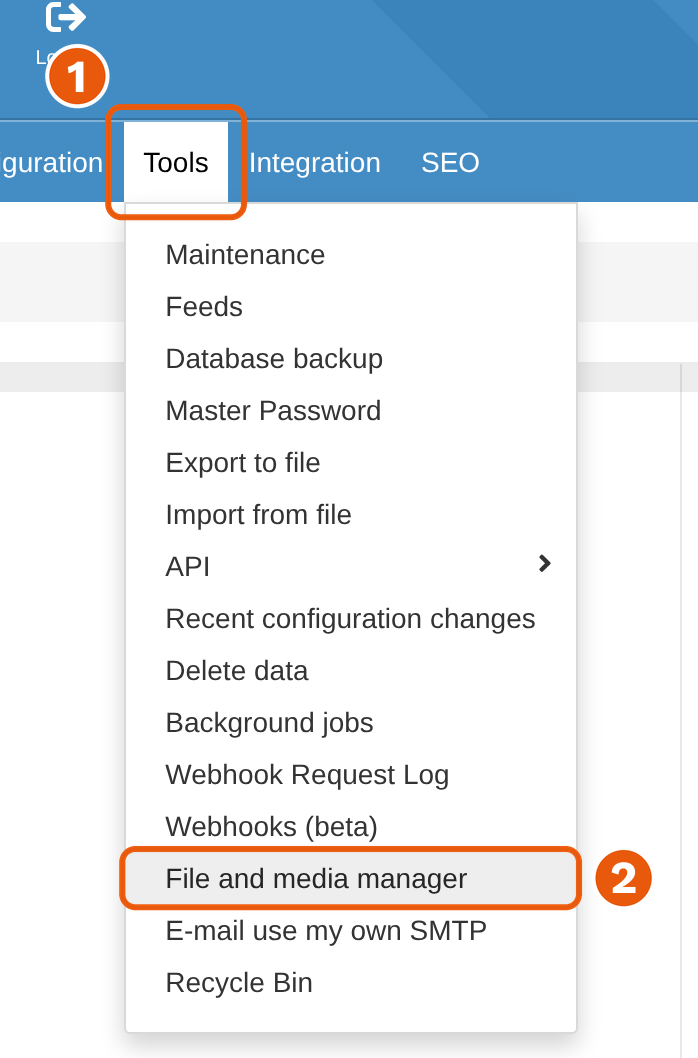
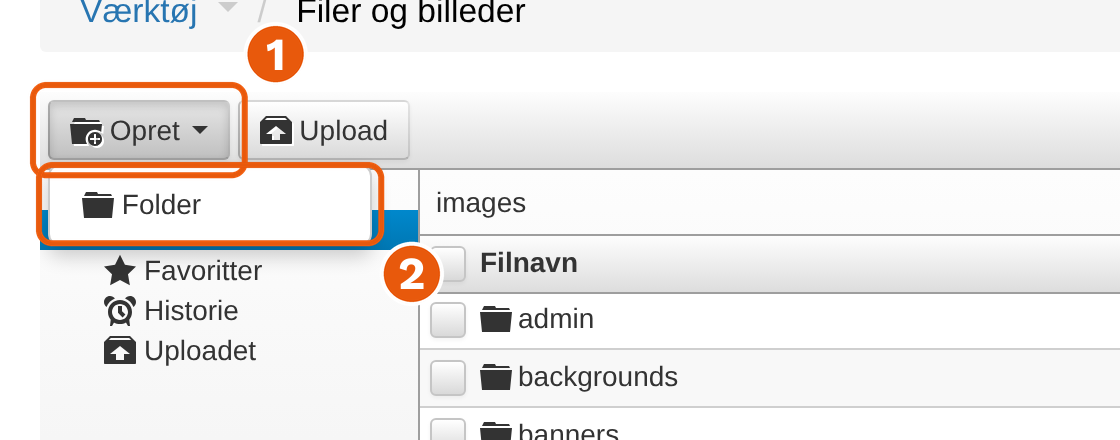
The file manager may show its own buttons in Danish, as in the pictures here. Click Opret (Create) (1) at the top left, and choose Folder (2).
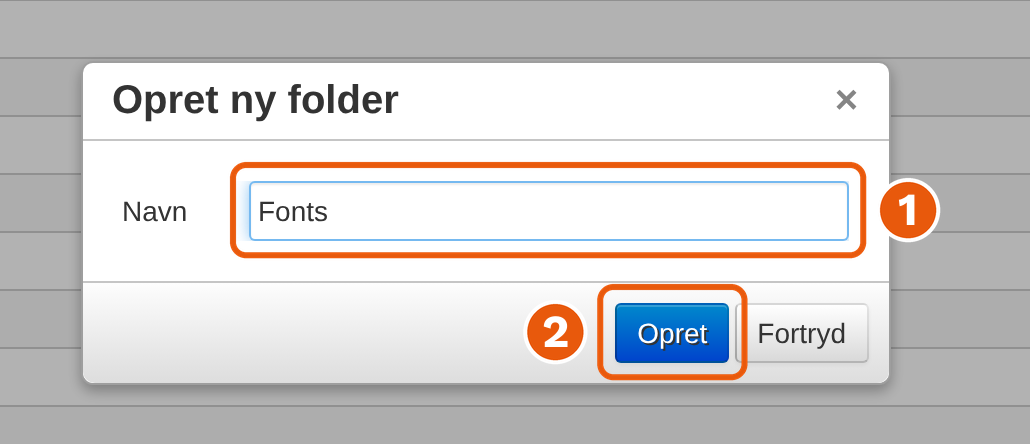
Type Fonts in the Navn (Name) field (1), and click Opret (2).
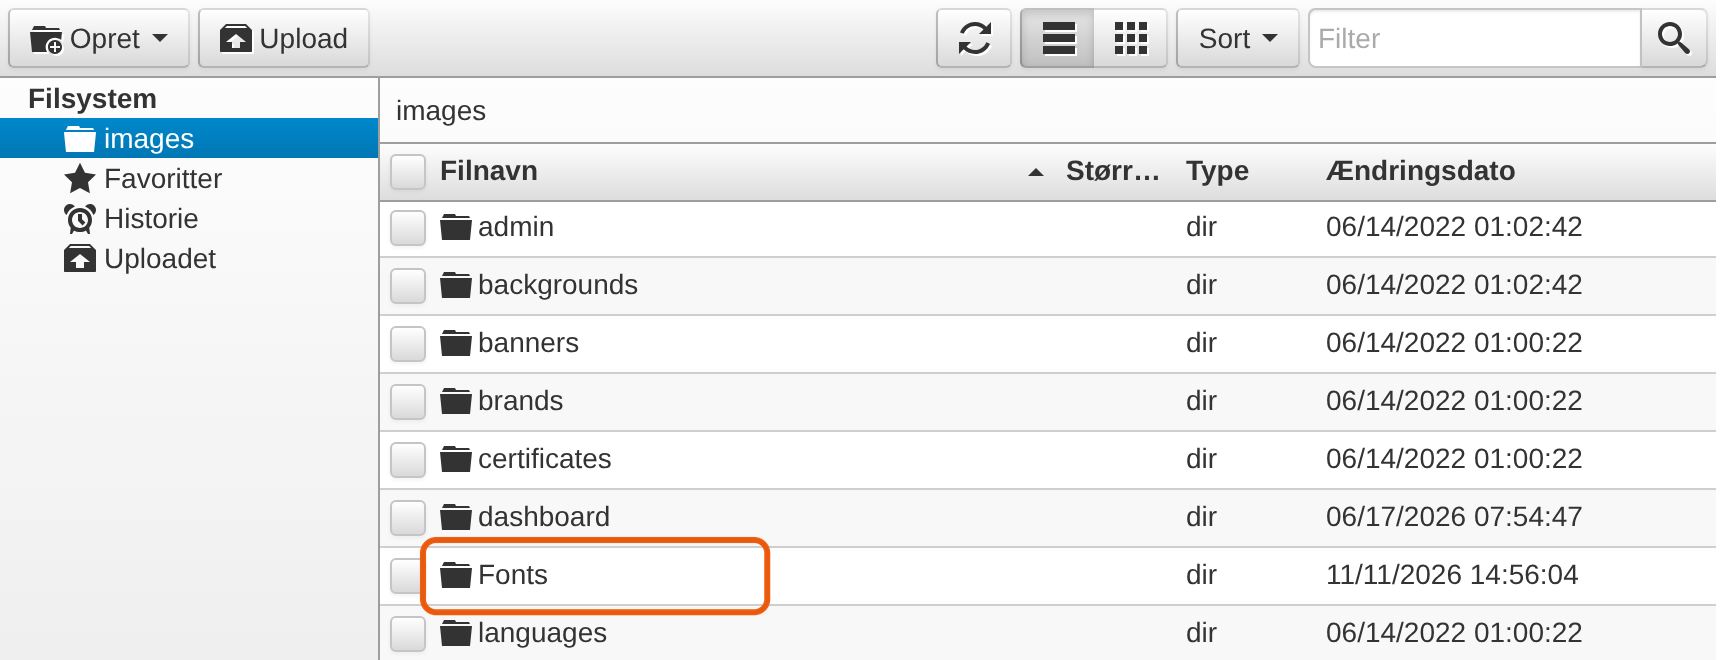
The folder now appears in the list with the other folders. Click Fonts to open it.
2. Upload the font
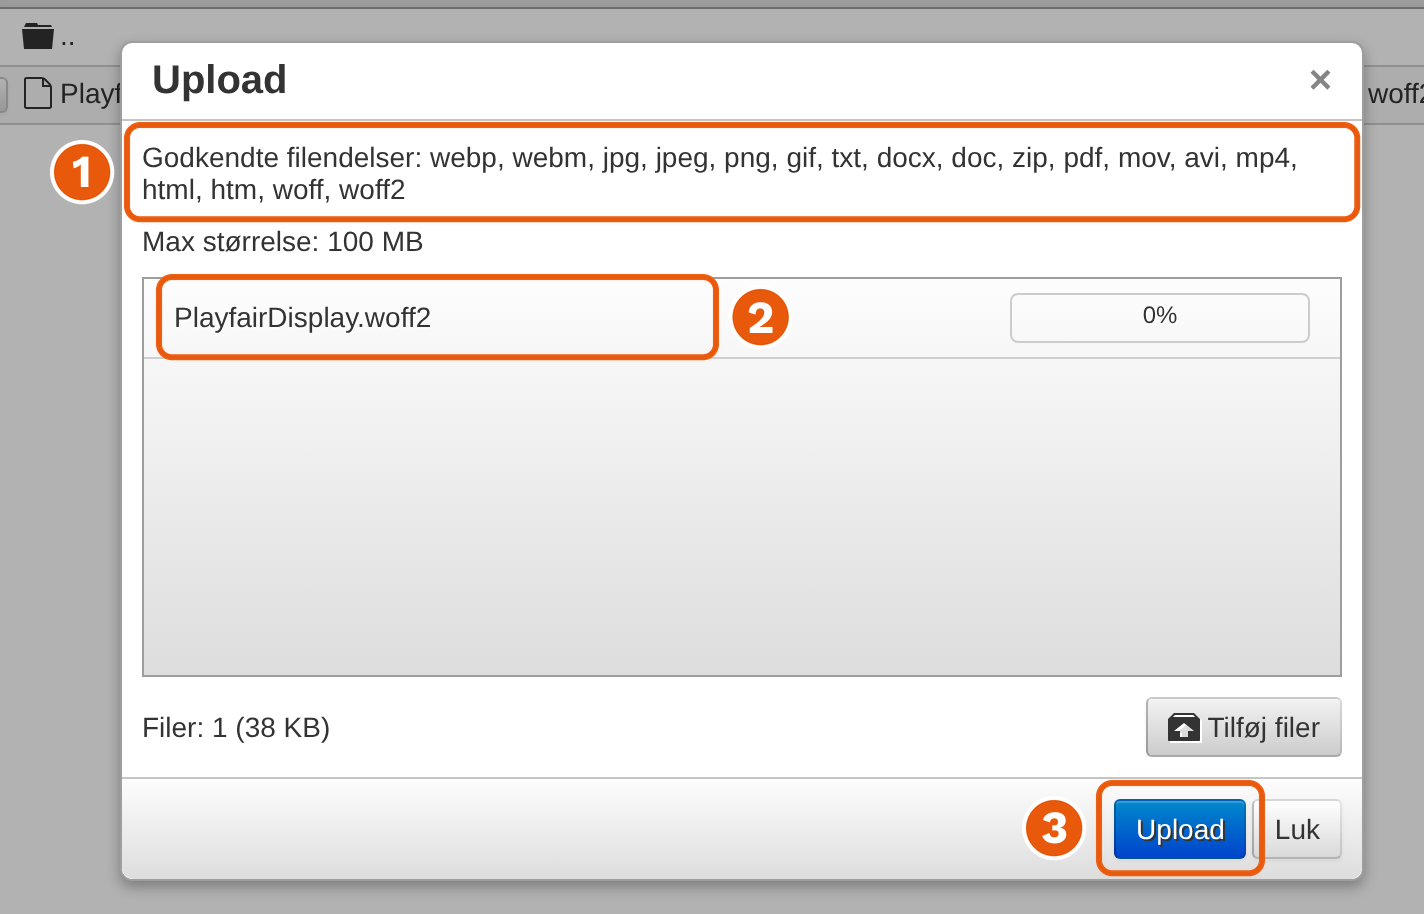
Inside the Fonts folder, click Upload. Drag your .woff2 file into the window, or choose it with Tilføj filer (Add files).
At the top of the window you can see which file types are accepted (1). woff and woff2 must be on the list. When the file appears in the list (2), click Upload (3). Then close the window with Luk (Close).
The file is now in the folder images / Fonts (1), and you can see it in the list (2).
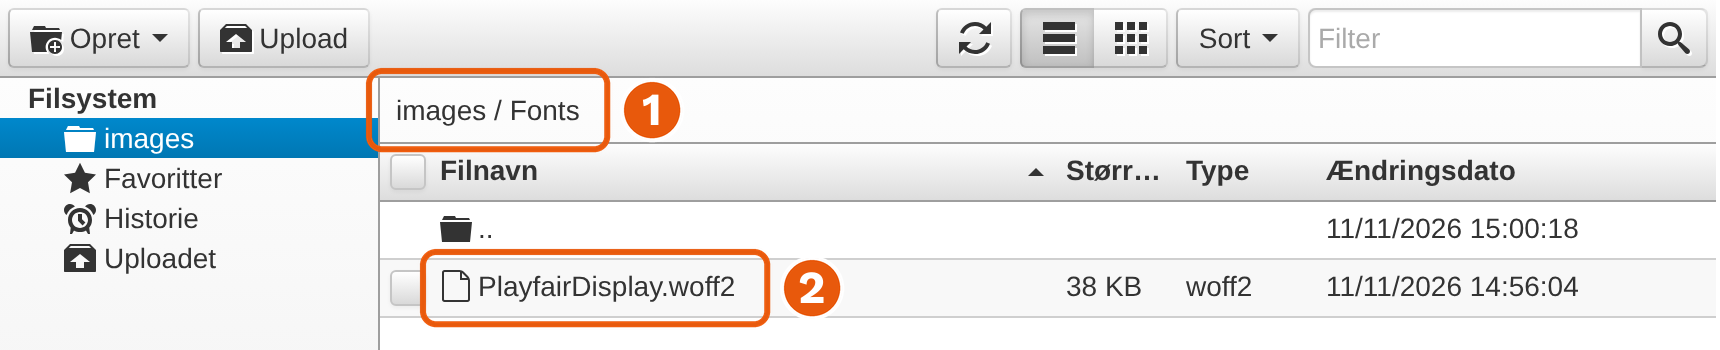
Make a note of the file's address, as you need it in the next step. The address is the path you see at the top, with a slash in front and the file name at the end:
/images/Fonts/PlayfairDisplay.woff2
Write it exactly as it is, capital and small letters included. With a small f, /images/fonts/, the shop cannot find the file.
3. Tell the design about the font
Go to Content & layout > Code Editor, and click the file user-styles.less in the list on the left. That is the file for your own CSS.
Paste this code into the file. Use your own font's name and the address from step 2:
@font-face {
  font-family: 'Playfair Display';
  src: url('/images/Fonts/PlayfairDisplay.woff2') format('woff2');
  font-weight: normal;
  font-style: normal;
  font-display: swap;
}
font-family is the name you use for the font in the rest of the code. src is the address of the file. font-display: swap shows the text in a fallback font until the font has loaded, so the page isn't left without text in the meantime.
If you have a separate file for bold text, upload it too and add another block just like this one, with the same font-family, the new file's address and font-weight: bold.
4. Use the font
Now the design knows the font, but it is only used once you say where. Write that in the same file, below the block from step 3. Here we use it for the headings:
h1, h2, h3 {
  font-family: 'Playfair Display', Georgia, serif;
}
Georgia and serif are fallback fonts. The browser uses them if the font cannot be loaded for some reason. If you want the font on all text in the shop, write body instead of h1, h2, h3.
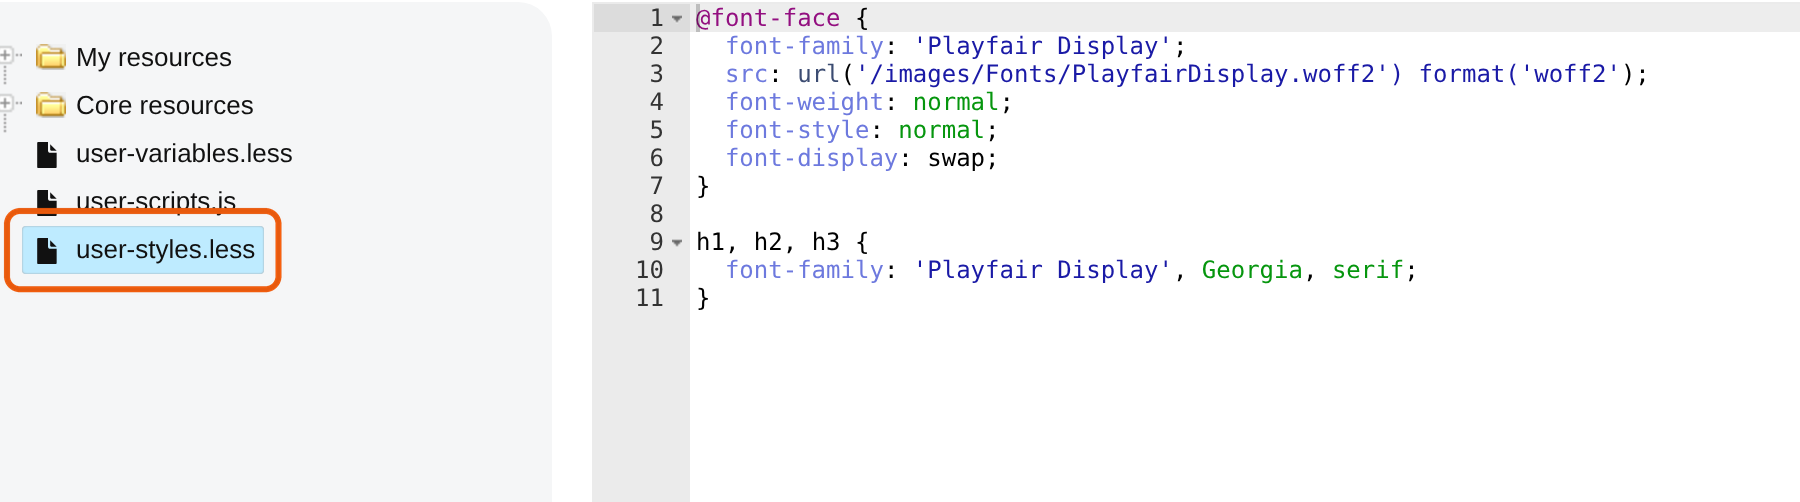
Click Save changes below the editor. Don't click the red Reset file to default button next to it: it sets the file back, and your code disappears.
Once you have saved, the shop uses the font straight away. If you can't see it, reload the page in your browser. This is how the headings look in our demo shop afterwards:

Did you add the font as code before?
Before the file manager accepted fonts, some people put the font itself into user-styles.less as a long string of code. That works, but it makes the design's stylesheet much larger, and it has to load on every page. In one case we have seen, the file became about 100 KB smaller when two fonts were moved out into files.
If you have done that, upload the font as a file as described here, and replace the long code in src with the file's address.